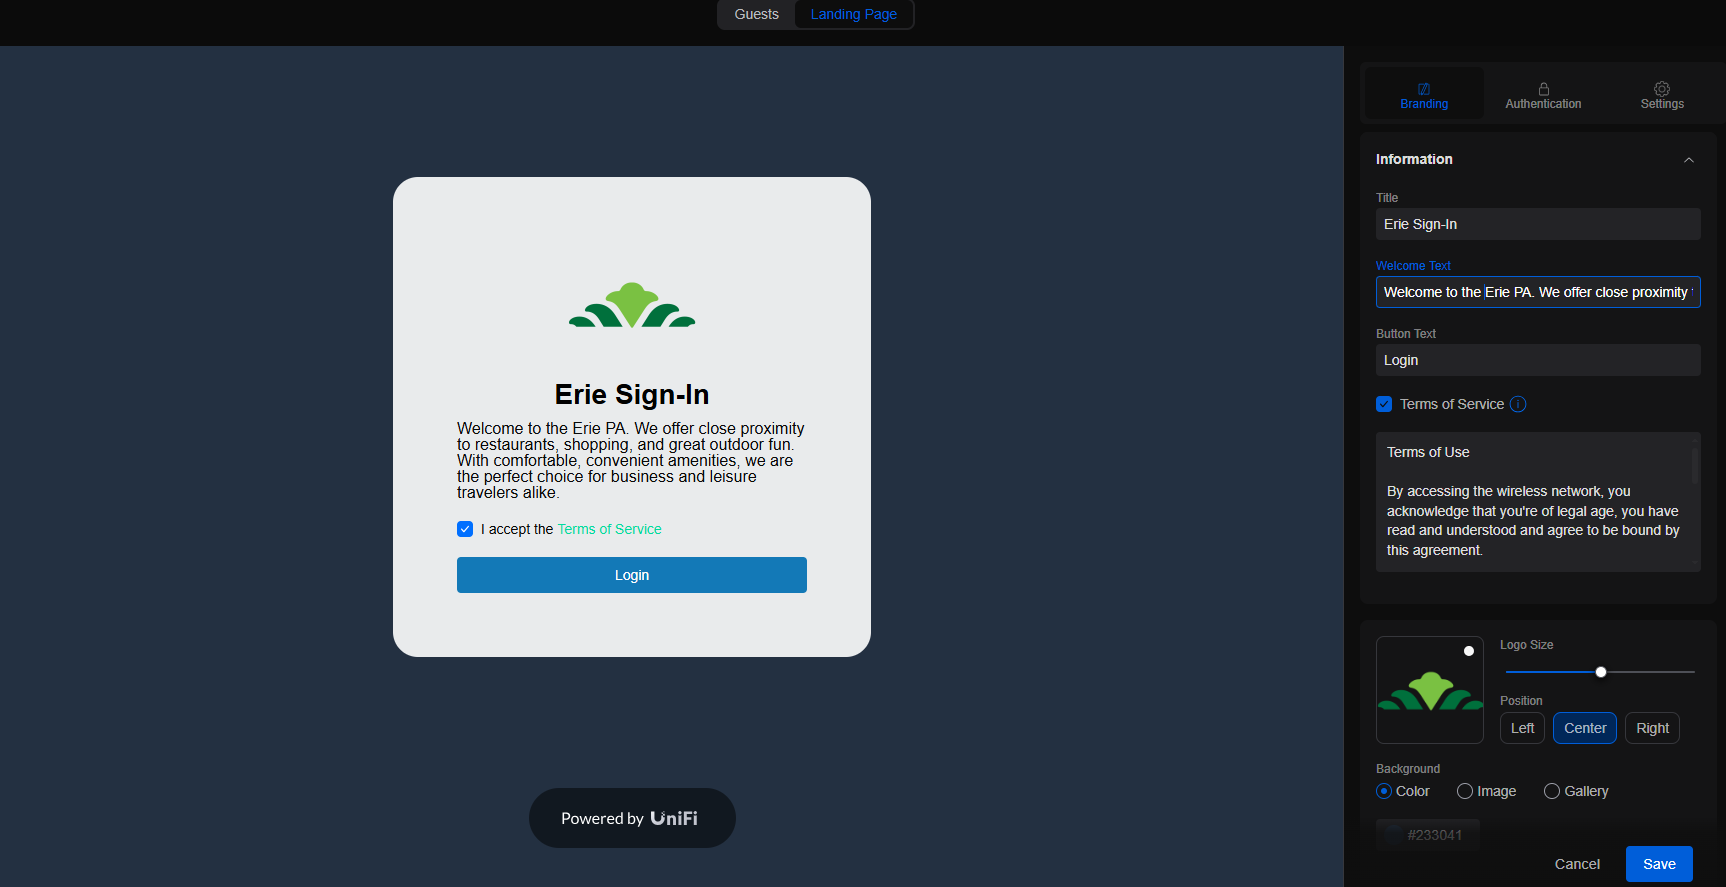
A guest captive portal is essential for providing controlled access to your network while offering a user-friendly interface for visitors. UniFi’s management system offers extensive customization for captive portals, from branding to authentication, making it a robust tool for managing guest access. Below is a step-by-step guide on setting up a UniFi Guest Captive Portal, focusing on branding, authentication, and settings.
Table of Contents
Getting Into the Portal Configuration
To start configuring your UniFi Guest Captive Portal, you first need to enable the Hotspot Portal for the desired SSID. Once you enable this feature, a dialog box will appear. In this dialog, you’ll find a link that directs you to the Hotspot Portal configuration page. Clicking on this link will take you to the detailed settings where you can customize the portal further.
It’s important to note that the captive portal setup on the WiFi tab operates on the access points (APs) and only works for wireless clients. This ensures that only users connecting through Wi-Fi will encounter the captive portal, providing controlled access to your network. If you have a Unifi Gateway you can set up a captive portal on the network tab instead of the WiFi tab. Going the network route enables a portal for both wired and wireless clients but requires the Unifi gateway.

1. Branding Your Captive Portal
Branding is essential to ensure that your guest portal aligns with your organization or property’s image. In the UniFi portal setup, you can easily customize the interface to match your brand.
- Title and Welcome Text: Start by editing the Title and Welcome Text. The title can be the name of your network or a welcoming message, such as “Erie Sign-In.” The welcome text should briefly describe your services and location, such as: “Welcome to Erie, PA. We offer close proximity to restaurants, shopping, and great outdoor fun. With comfortable, convenient amenities, we are the perfect choice for business and leisure travelers alike.”
- Logo: You can add your logo to the portal, adjusting the size and position to suit your preferences. In this case, the logo is centered for a balanced look.
- Background: Select a background color or image that fits your brand. A dark or neutral color works well for most applications, keeping the interface clean and readable.
- Terms of Service: It’s a good idea to enable the “Terms of Service” checkbox. This ensures that guests acknowledge and accept the terms before accessing the network.

2. Configuring Authentication Methods
UniFi provides multiple authentication methods to ensure that only authorized guests can access your network.
- Password Authentication: This is the most straightforward method, where guests enter a password to access the Wi-Fi. It’s ideal for small venues or those that want to control access without much hassle.
- Facebook Authentication: Allowing guests to log in via Facebook is another option. This can be a convenient method, especially in social settings like cafes or event spaces.
- Payment and Vouchers: If you wish to monetize your Wi-Fi, you can enable payment or voucher options. This is useful in locations like hotels or public venues where you may want to charge for premium access.
- RADIUS: For more advanced setups, RADIUS servers can authenticate users. This method is ideal for larger organizations that need more control over user access.
- External Portal Server: If you have a custom authentication server, UniFi allows integration through the “External Portal Server” option. This provides flexibility for those who require a more tailored solution.

3. Adjusting Portal Settings
Once you’re on the Hotspot Portal configuration page, you can adjust various settings to optimize performance and security:
- Default Expiration: This determines how long a guest’s session remains active before they must log in again. In this case, it is set to 7 days.
- Language Support: If your venue caters to international guests, consider enabling multiple languages. Here, English is selected as the primary language.
- Landing Page Settings: Make sure the landing page is visible to guests by enabling the “Show Landing Page” option. You can also enforce HTTPS redirection for secure access and enable encrypted URLs.
- Domain: Adding a custom domain, such as “unifi.dog.com,” helps in creating a seamless user experience. This domain should be associated with your portal to maintain brand consistency.
- Pre-Authorization Allowances: If you want to allow certain domains or IP addresses to bypass the portal, add them to the pre-authorization list. For instance, allowing domains like “dog.com” or “horse.com” can help trusted sites or services bypass the captive portal.

Conclusion
Setting up a UniFi Guest Captive Portal involves customizing branding, choosing the right authentication methods, and configuring settings for optimal performance and security. With these steps, you can create a seamless and secure Wi-Fi experience for your guests that aligns with your brand and meets your needs.
This setup can be tailored further depending on your specific requirements, such as using more advanced RADIUS authentication or integrating a custom external portal server. Regardless of the specifics, UniFi’s system offers the flexibility and control needed to provide a top-notch guest Wi-Fi experience.


Comments
One response to “Setting Up a UniFi Guest Captive Portal: Branding, Authentication, and Settings”
[…] up a guest captive portal is a common requirement in hospitality environments. Our captive portal guide explains how to configure and customize this […]