Introduction
In large networks, especially those spread across multiple subnets, efficient IP address management becomes crucial. DHCP (Dynamic Host Configuration Protocol) plays a vital role in this, automating the assignment of IP addresses and other network configuration details. However, DHCP typically operates within a single subnet, which can be limiting in complex network environments. This is where DHCP Relay comes into play, extending the reach of DHCP servers across multiple subnets. In this article, we will delve into the concept of DHCP Relay, its importance in UniFi environments, and how to configure it effectively.
Table of Contents
What is DHCP Relay?
DHCP Relay is a network function that allows DHCP requests from clients in one subnet to be forwarded to a DHCP server located in another subnet. This function is essential in scenarios where the network is divided into multiple VLANs or subnets, and a centralized DHCP server is used. Instead of deploying a DHCP server on every subnet, a DHCP Relay agent can be configured to forward requests to a centralized server, streamlining IP management and reducing administrative overhead.

Importance of DHCP Relay in UniFi Networks
In UniFi networks, especially those deployed in enterprise environments, VLAN segmentation is common to separate different types of traffic—such as guest Wi-Fi, VoIP, and internal communication. Each VLAN typically operates in its own subnet. Without DHCP Relay, each VLAN would require its own DHCP server, leading to increased complexity and resource usage. By implementing DHCP Relay, a single DHCP server can serve multiple VLANs, simplifying the network architecture and ensuring consistent IP address assignment across the entire network.
How DHCP Relay Works
When a client device on a subnet without a DHCP server sends out a broadcast request for an IP address, the DHCP Relay agent intercepts this request. The agent then forwards the request to a DHCP server on another subnet, including information about the original subnet where the request originated. The DHCP server responds with an IP address offer, which the relay agent then forwards back to the client. This process ensures that clients on different subnets can still obtain IP addresses from a centralized DHCP server.

Configuring DHCP Relay in UniFi
Configuring DHCP Relay in a UniFi network involves several steps. Here’s a step-by-step guide:
1. Plan Your Network Subnets and VLANs
- Before configuring DHCP Relay, ensure that your network subnets and VLANs are properly planned. Each VLAN should have its own subnet, and the DHCP server should be configured to serve IP addresses for each subnet.
2. Set Up the DHCP Server
- Configure your DHCP server with scopes for each subnet. Each scope should include the IP address range, subnet mask, and other necessary configuration details (such as default gateway and DNS servers) for that subnet.
3. Enable DHCP Relay on UniFi Devices
- Log into your UniFi Controller and navigate to the network settings for the relevant devices (typically the UniFi Security Gateway or UniFi Dream Machine).
- Go to the Networks section and select the network or VLAN where you want to enable DHCP Relay.
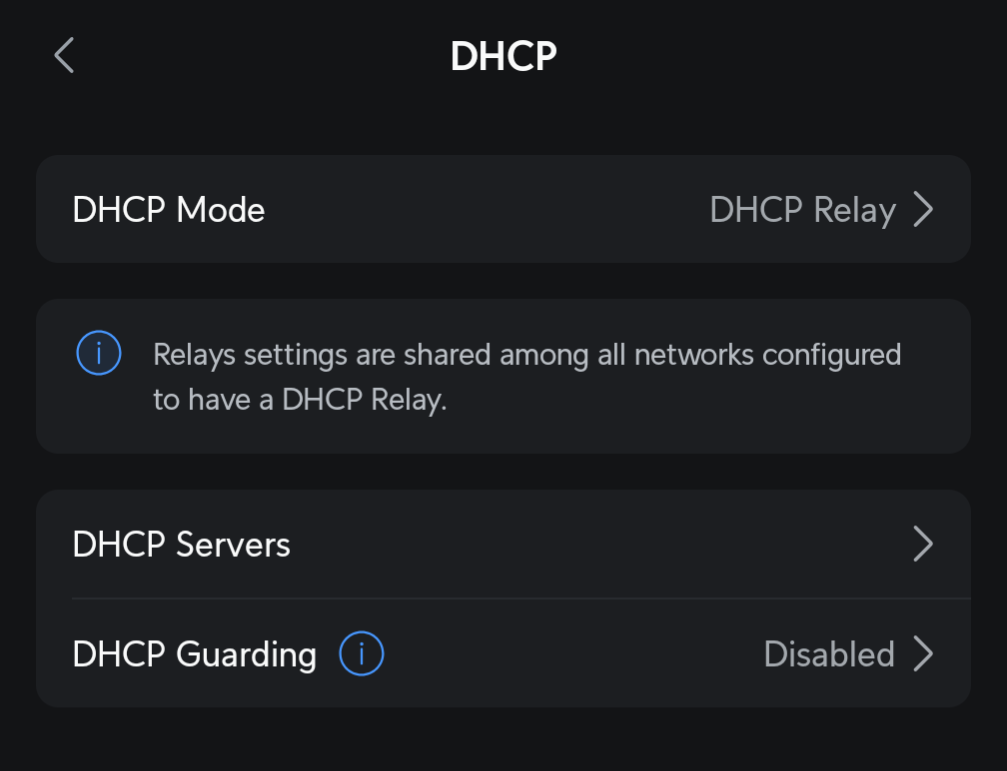
- In the DHCP Mode drop-down, select DHCP Relay.
- Enter the IP address of your centralized DHCP server. This tells the UniFi device where to forward DHCP requests.
- Save your settings.

4. Configure Firewall Rules (If Necessary)
- Depending on your network configuration, you may need to adjust firewall rules to allow DHCP traffic between the relay agent and the DHCP server. Ensure that UDP traffic on ports 67 and 68 (used by DHCP) is permitted between the relevant subnets.
5. Test Your Configuration
- After configuring DHCP Relay, test the setup by connecting devices to different VLANs and verifying that they receive correct IP addresses from the centralized DHCP server. Use tools like
ipconfigon Windows orifconfigon Linux/macOS to confirm the assigned IP addresses.
Troubleshooting Common Issues
- No IP Address Assignment: If clients are not receiving IP addresses, ensure that the DHCP server is reachable from the subnet where the clients are located. Check firewall rules and verify that the relay agent is correctly forwarding requests to the DHCP server.
- Incorrect IP Address Range: Ensure that the DHCP server is configured with the correct scopes for each subnet. If a client receives an IP address from the wrong range, verify that the relay agent is properly configured with the correct server IP address.
- Multiple DHCP Servers: If there are multiple DHCP servers on the network, ensure that they are not serving overlapping subnets, as this can cause IP conflicts and connectivity issues.
Conclusion
DHCP Relay is a powerful tool in UniFi networks, enabling centralized IP address management across multiple subnets and VLANs. By leveraging DHCP Relay, network administrators can simplify their infrastructure, reduce costs, and maintain a consistent configuration across the entire network. Whether you are managing a small office or a large enterprise, understanding and implementing DHCP Relay in your UniFi network can significantly enhance your network’s efficiency and scalability.
This guide should serve as a comprehensive resource for setting up and optimizing DHCP Relay in UniFi environments.

